hedgehogleatherworks
by Paul Scheiter
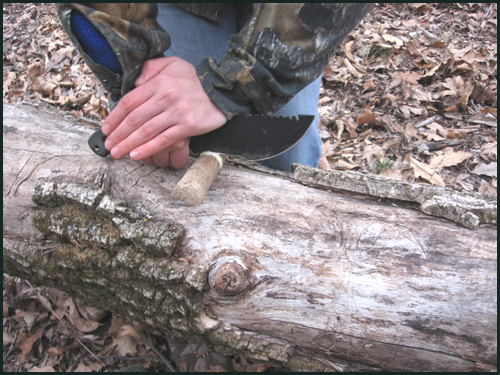
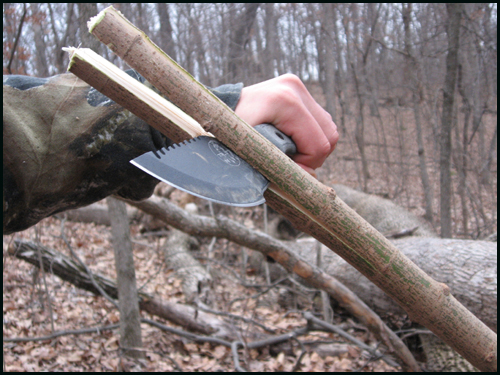
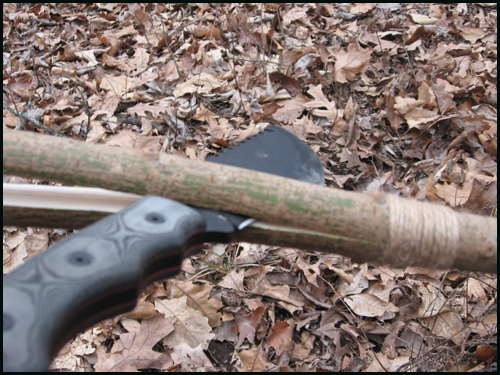
Choosing The Sapling This is the same tree I used last month in conjunction with the Hoffman Harpoon. You are going to want a tall, straight sapling, about two inches in diameter. I start by creating a pressure cut around the perimeter of the tree with my Tracker Knife. There is no carving involved in this technique. You are simply applying heavy pressure while rotating the knife around the wood. Do this to the thick end of the tree: the part that is closest to the roots.
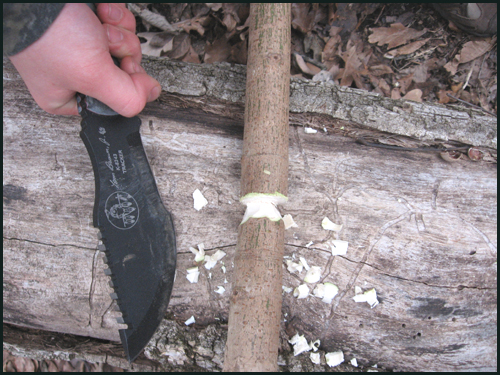
Carve One Side After making the pressure cut, I carved away only on the short side. As I shave away the wood, the short end becomes pointed and the long end remains flat.
A Clean Break The wood has now been weakened exactly where I want. One easy tap with the back of my Tracker Knife causes a clean break to occur. Discard this short section of stick.


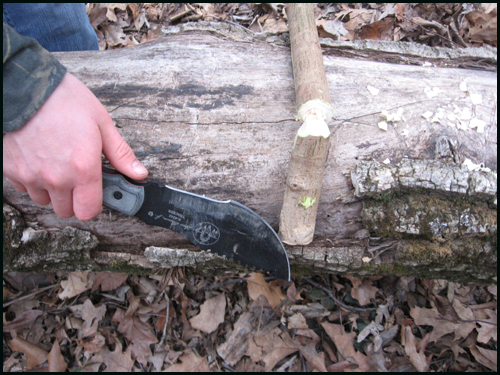
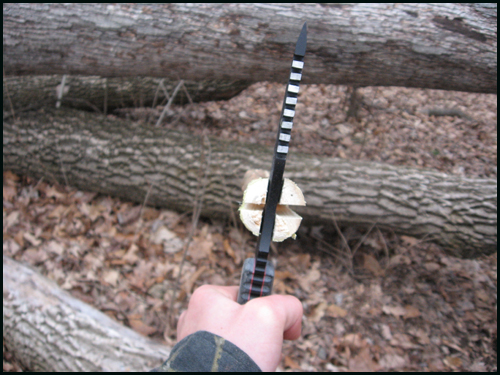
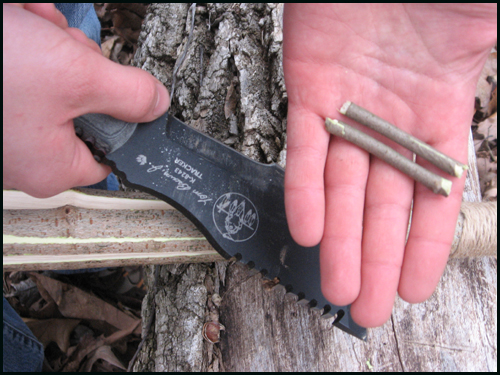
Brace and Align the Knife Secure the small end of the sapling against a sturdy surface such as a fallen tree or a large rock. Now place the straight portion of your knife across the freshly broken end. Make sure it rests exactly down the middle.
The First Split Find a wrist-thick piece of wood and tap the back of the knife. This will let the knife split the wood in a very easy and controlled manner.
After Tapping
A quick view of the sapling as it should be after the first tapping. Do not go very far and be sure to keep the split running EXACTLY down the middle.
The Second Split Now make another split using the exact same technique. This time it should be perpendicular to the first split. This will divide the end of the sapling into four even sections.
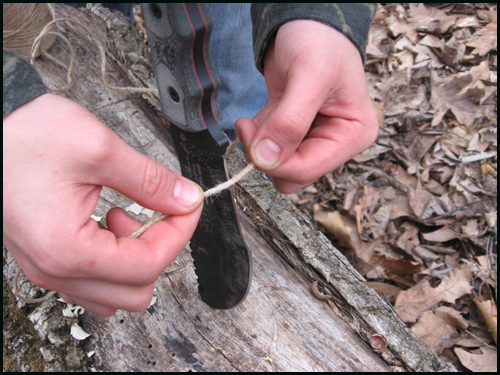
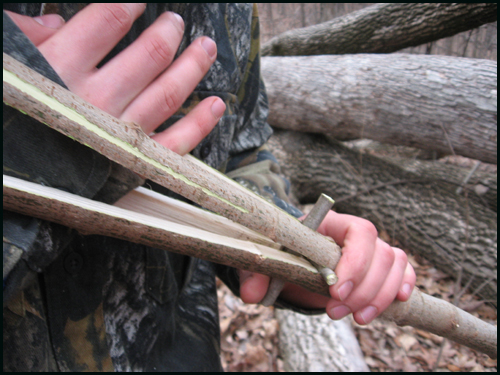
Stop Drop and Cut
Now before you split too far into the wood, stop and cut a peice of cordage about four feet long. In this picture I am using natural jute twine, which is available at most hardware stores.
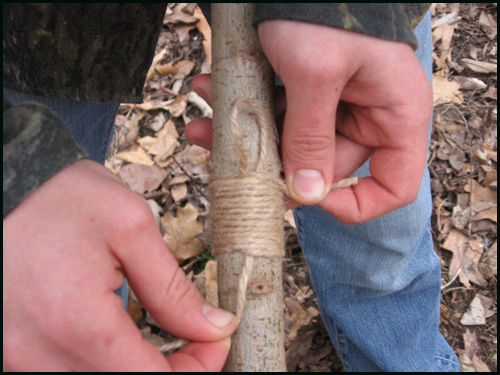
Lashing
Now lash the cordage around the sapling about 18 inches or so from the end. This will ensure that the wood does not keep splitting past this point.
Finish the Splits
Continue both splits until they run all the way up to the lashing you just finished.
Spreader Twigs
Now find and carve two small twigs that are just a bit longer than the width of the sapling.
Work Em’ In!
One at a time, slide the twigs as far up and close to the lashing as possible. You may have to pry the wood with your hand to make the twigs fit. The spear really starts coming to life here as the four sections spread out.
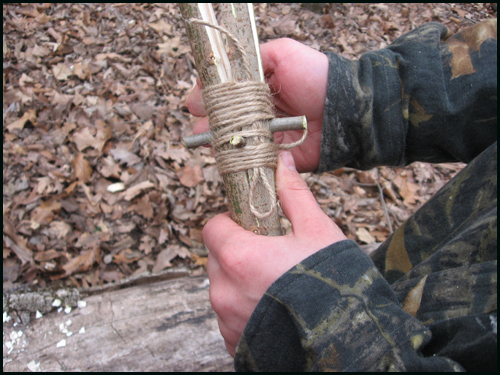
One Final Lasing
Now lash those twigs securely into place with another section of jute twine.
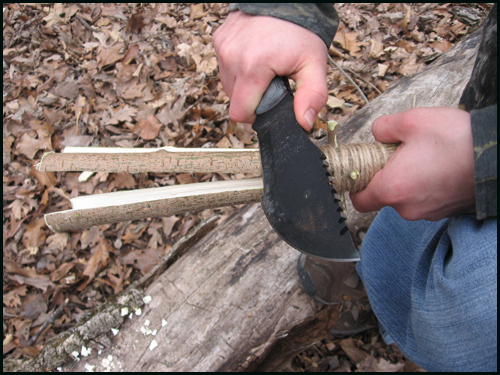
Carve the Outside Begin shaving the outside of each prong section by carving away from you with the knife.


Final Touches
Then add the finishing touches by shaving out some of the inside of the prongs. To do this, stabalize the spear and then slowly and gently pull the knife toward you using the curved portion of the blade to cut. Watch your fingers!
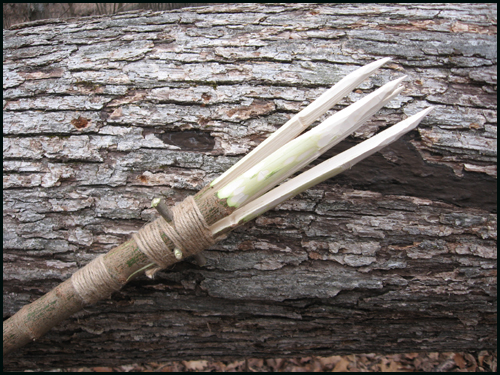
Final Touches
Then add the finishing touches by shaving out some of the inside of the prongs. To do this, stabalize the spear and then slowly and gently pull the knife toward you using the curved portion of the blade to cut. Watch your fingers!

hedgehogleatherworks
by Paul Scheiter