How to Raise Honeybees in Mason Jars

![]()
Getting Started
Before you do anything, it’s important to use common sense and realize that not everyone can build a hive for thousands of bees in their back yards. This is particularly true for those who live in populated areas. You need a lot of open space to create your own bee colony, and it’s important that you are also familiar with local regulations before beginning this project. However, if you are in a position where you can, this project can give you access to something that is not only incredibly healthy and delicious, but easy to sell or barter with as well.
![]()
Required Items
12 quart sized mason jars with wide mouths
2 pieces of plywood that are at least 2” x 12” x 6′
2 pieces of plywood that are at least 1” x 1” x 6′
1 piece of plywood that is at least 16” x 20”
1 box of inch-long wood screws
1 beehive bottom board (or make your own)
Starter bees and honeycombs
![]()
Cutting the wood

We are going to make a box that is big enough to house the 12 mason jars. For purposes of this exercise, the dimensions will be as follows: The sides will be 22” long. The front and back of the box will be 18” wide and the plank that holds the mason jars will be 16” x 20”. However, you can modify this as needed.
Take both planks and cut out four pieces from each one. The first plank needs to be cut into four 22” long pieces and the second needs to be cut into 18” pieces. Set them aside.
To make the holder for the mason jars, you will need to measure out center holes for each one. The easiest way to do this is by using a tape measure, pencil and drill. Each hole should be 3 ½ inches in diameter, but this may vary depending on the type of mason jars that you are using. Trace out little squares with the measuring tape and pencil, and drill a hole in the center of each one. Take a lid from one of the mason jars, flip it over, and use it to trace out the circles within each square with the pilot hole in the center.
Cut out the circles. You can use any saw or dremel attachment you like, but a hole saw will be the easiest to work with. Remove each cut circle of wood and sand down the edges of the holes.
![]()
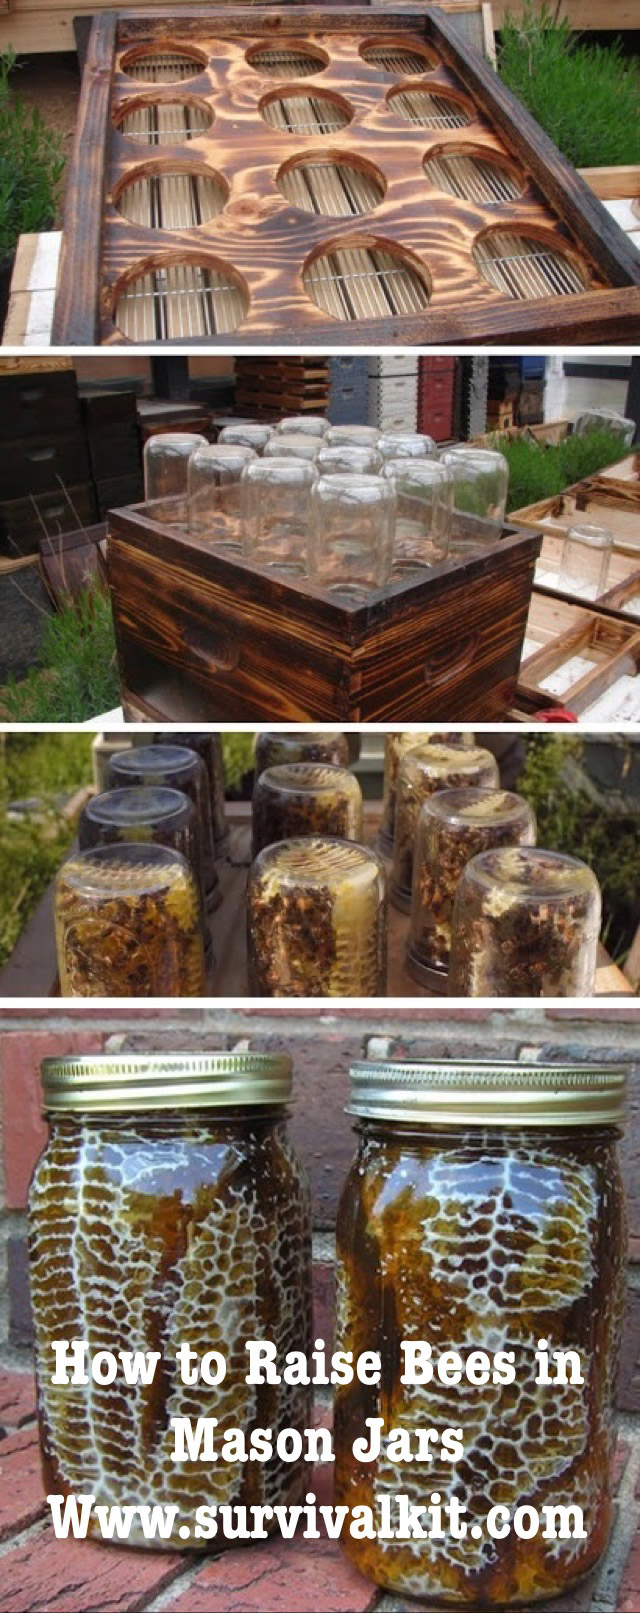
Fitting the Pieces Together

You can make this part as simple or as complicated as you like by cutting away notches and grooves for the sides of the box. However, for purposes of this example, simply screw all four sides together and place the box on a firm and flat surface. Insert the plank with the holes and let it rest on the bottom of the box before screwing in place. Attach the beehive bottom board atop the plank with the holes, and flip the box over so that the side with the plank and holes is on top.

Place starter hives and bees into each mason jar, invert and place on top of each hole. All you need to do now is wait for the bees to do their thing. Once the jars become filled with honey, turn them over (while wearing protective clothing) and wait for the bees to escape. Remove about ¾ of the honey from each jar before placing back on the box. This will leave enough for the bees to feed off of as they replenish the honeycombs.
Keep in mind that this is a very rudimentary project that will not have the stability or effectiveness of traditional beekeeping hives. However, it is also a fun project to try, and with some patience and experience, can produce a good amount of honey. Try it for yourself, but make sure that you always take necessary precautions in order to protect your body when working with bees.