How to Make Wax Slugs in Minutes
Shotguns are exceptional for shooting targets at close range. However, their effectiveness significantly diminishes with distance as pellets cover a broader area with less force upon impact. One of the best ways to offset this limitation is to create wax-based slugs and insert them into shotgun shells. This produces a solid projectile that can travel at greater distances while penetrating targets with much more force. Let’s take a look at how easy it is to make these alterations at home, and you can expand your hunting as well as defensive capabilities within minutes.
Paraffin Wax and Shell Preparation
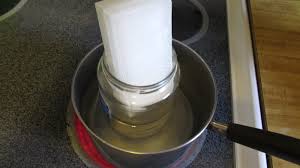
The first step is to prepare the wax and shells for modification. You want to use parrafin wax whenever possible due to its purity as well as high flash point. It is important to heat the wax to just below the point when it begins to smoke. You want the wax as hot as possible to ensure that it can penetrate between the shot pellets and create a dense form as it cools. It is also possible to use regular candle wax, however its viscosity and cooling point may prevent complete penetration within the shells. This can lead to misfires, jamming and even the exploding of the gun if the shell buckles or deforms.
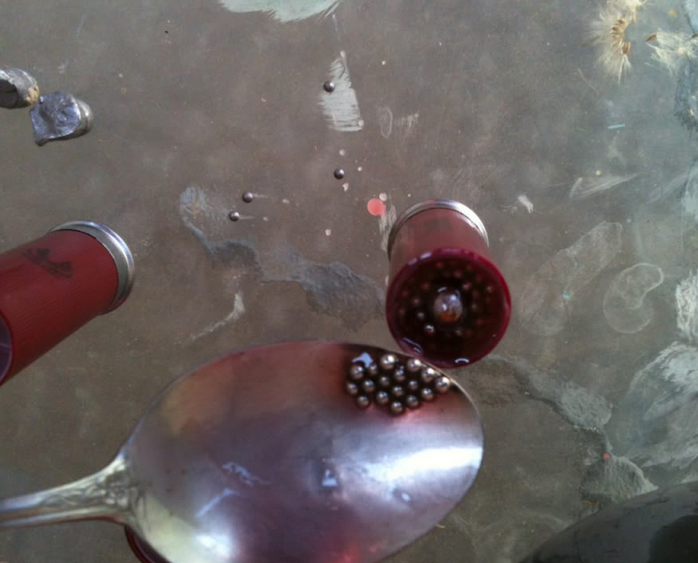
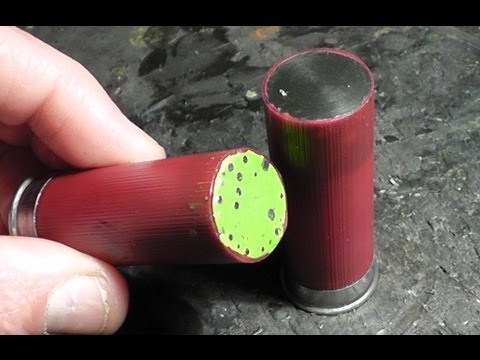
Carefully cut away the top rim of the shell and gently remove the cap. It is important that you do not gouge or remove any portion of the top of the shell in the process. Pour out the shot pellets into a bowl and stand the empty shells up so that they can be filled once the wax is ready. Heat the wax and add the pellets as it begins to liquefy. Once the wax is heated to the point of smoking, take a teaspoon and carefully scoop the wax and pellets. Carefully pour into the empty shells until the shot and wax reaches the top of the plastic shell wad. You don’t want to over or under fill the pellets and wax, and keep in mind that you will not be able to replace all of the shells due to the volume of wax as well.
Cooling and Testing
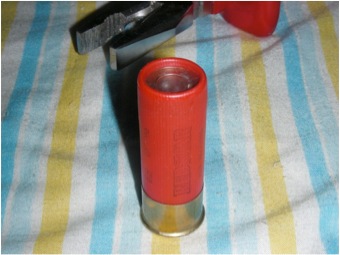
The slug will shrink as it cools, and you want to make sure that you have enough hot wax left to top off the shells and create a secure cap. It is important that don’t create much of a bulge on the finished product in order to maximize effectiveness once the shell is fired. Wipe down the top and sides of each shell to remove any excess wax deposits once they have cooled and store for future use.
The wax will create a tight seal between the slug and the walls of the shell wad and reinforce the strength of the shell. Pull off one of the the shell casings to test the finished product, and it should require a lot of force to remove. The slug should be perfectly joined to the rest of the shell and there should be no gaps or cracks.
You can use any kind of shot with this method, but it works exceptionally well with smaller pellets as they combine to create a strong slug. Expect to be able to penetrate targets up to 50 yards away with this method. Feel free to experiment with different shot sizes, shells and guns in order to get a sense of how far you can shoot as well as the power of the impact on a target. See for yourself how this trick will enhance the capabilities of your shotgun, and start building your stockpile today.
