How To Make An Off-The-Grid Tealight Slow Cooker

Required Items
Plywood
Screws, nails or glue
Appropriate tools
Stock Pot
Feet for the stand
![]()
The first step is to build a box that will contain the slow cooker as well as the tea candles. You want the box to be big enough to contain the pot as well as at least two inches taller than the height of the pot from below the handles to the bottom. You do not want the pot to rest directly on the bottom of the box because that’s where you will put the candles later. You also don’t want the pot to rest directly above the candles as well.

The tricky part is to figure out the best distance between the flame from the candles and the bottom of the pot. Areas of the pot will get hotter when they are closer to the flame. This can create uneven cooking in addition to scorching on parts of the bottom of the pot. The number of candles also influences that amount of heat that is generated.
Build the sides of the box with whatever wood and material that you like. Just keep in mind that the walls will need to support the weight of the stockpot once it’s filled, as well as the top of the box. The base of the box needs to support everything as well. Work with plywood that is at least an inch thick just to be on the safe side. Using screws will provide the strongest connection between pieces. However, wood glue and nails should suffice under most circumstances if you use ones that have the appropriate thickness and there is the box doesn’t wobble after it is built.
![]()
Fashioning the Top

You will need to cut out a circle in the center of the top that is about ½ inch wider than the diameter of the stock pot. If the pot flares out near the top, this needs to be taken into account as well. You can either let this flare serve as the anchor for the pot, or you can make the hole wider so that the handles rest on the hole instead. If you place the handles on the rim, make sure that the box is narrow enough so the edges of the handles stick out from the sides. This will enable you to get a good grip on the pot and lift safely. The top should also be made with plywood that’s between ¾ and an inch thick.
![]()
Fashioning the Bottom
You want to drill a series of ¾ inch diameter holes around the perimeter of the bottom of the box. This will provide the candles with oxygen while also allowing excess heat to escape. Fire is a concern when putting tea candles directly atop wood, but the temperatures shouldn’t come close to the ignition point of the wood unless it is coated with some sort of finish, paint or lacquer. Use wood that is untreated.
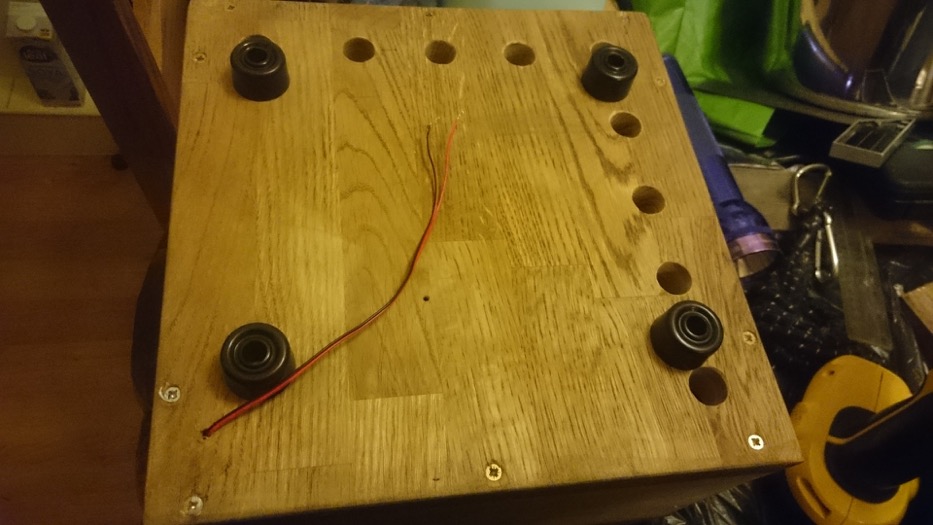
You also want to attach feet to the underside of the bottom in order to provide room for the air to move in and out of the unit. The bottom should be made with inch thick plywood.
![]()
Adding the Candles

The number and type of candles that you use will determine the quality of the heat that you can expect to generate. Tea candles usually come with various burn times, and you can choose long-lasting verses short-burning ones. One strategy is to use a handful of long-lasting candles to provide consistent heat throughout the cooking process. You can use a few short-burning candles to help to bring the ingredients in the pot up to a boil before they extinguish.
Play with different combinations until you find the method that works best for you. You can also boil water with a different method and then transfer the pot into the box once it reaches the right temperature.
With the right combination of candles, height, ventilation and recipe, you can keep a meal cooking at a simmer for more than 10 hours. While this may use a handful of tea candles, this is an incredibly-efficient option to consider. Just remember to never leave the unit indoors unattended while the fire is burning. However, as long as you take proper precautions, the chances of starting a fire are minimal at best. You can also line the bottom of the box with foil in order to minimize heat from the base of the candles transferring into the box.
This is just a general outline of a basic concept, and there is plenty of room for improvisation. Feel free to add your own creative ideas to this project in order to make it as efficient and practical as possible.
![]()