How to Make a Roller Washing Machine

Lots of rudimentary washing machine projects involve the use of a frame and handle to rotate the barrel. However, you can also build one that uses a simple base, casters and a wheel from an old lawnmower to make it easier to turn. Look at the following steps and see how easy it is to put this trick to work for you in the field.
Basic Material
1 garbage can (plastic or aluminum)
4 casters that are minimum of two inches in diameter
1 lawnmower wheel and stem to anchor it in place
3 2×4 planks of wood that are long enough to build the frame
1 short 2×4 plank, cut in half horizontally for the ribs inside the can
Deck or sheet metal screws
Washers or duct tape
Preparing the Frame
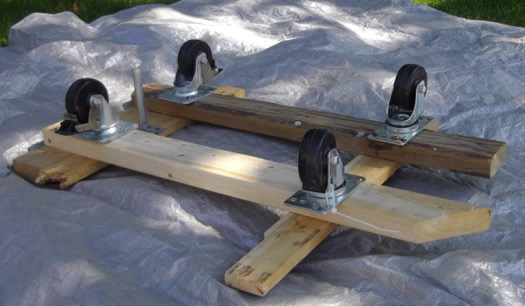
The first step is to build a frame that is big enough to house the can and wheels. The frame will be rectangular, with the boards that hold the wheels resting on top of the side pieces. Place the wood on the ground and line everything up. Space the wood that will hold the wheels about six to eight inches apart. You want to find the sweet spot that will be wide enough to hold the garbage can and allow it to easily rotate on the wheels. Mark where the casters will be attached.
Secure one side wall of the frame with the top pieces with some screws, but nails will work just as well. Leave the other side wall loose so you can adjust for the fifth wheel later. The next step is to attach the casters and stem for the big wheel. Make sure the four wheels are spaced and aligned evenly on each piece of wood. Attach the stem to the side piece that you did not secure to the frame, and secure the lawnmower wheel in place.
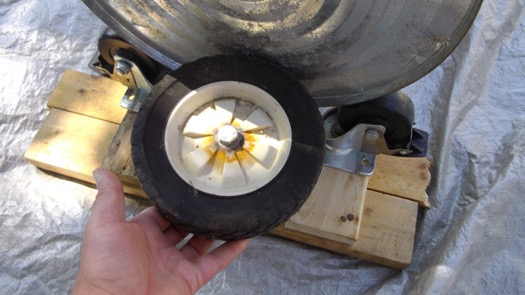
Place the garbage can on its side and push it against the fifth wheel. Move the board with the wheel out until the can is aligned with all of the wheels and rotates freely. Remove the can and secure the fifth wheel board in place.
Preparing the Can
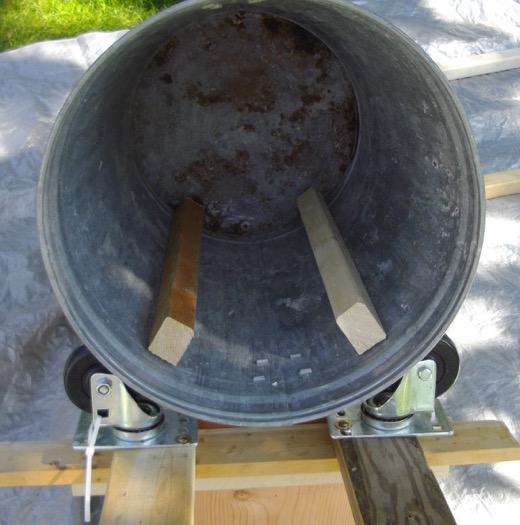
You want to take your two pieces of 2×4 that was cut down the middle and anchor them at a 45 degree angle with respect to the inside of the can. You want to secure the ribs with at least two screws and washers. Mark where the screws will be attached and poke holes in the sides of the can. You want to screw the wood in place from the outside in, so insert the washers so they positioned properly before attaching the ribs. Secure the screws into the ribs. Use duct tape to cover the heads of the screws on the outside of the can to minimize leakage when it is filled with water.
All you need to do now is fill the can with water, detergent and laundry. Secure the lid and place it on its side atop the wheels and rotate. You will need to make modifications to make sure the lid is firmly attached to the can to prevent water from spilling out. You may also want to consider adding a drain hole between the ribs in the can as well. This will make it easier to lift the can and remove the clothing when finished washing.
This trick is the perfect substitute for field machine designs that require more material and complex assemblies. Try this out for yourself and see how easy it is take this general idea and turn it into an efficient way to wash clothes.