How to Make a Cheap and Effective Manual Vacuum Sealer
![]()
Required Items
1 syringe
2 feet of aquarium air tubing
1 aquarium “T” connector
2 aquarium check valves
Some tape
Pair of scissors
Heavy-duty plastic zipper baggies
![]()
Assembling the Tubing, Connector and Valves
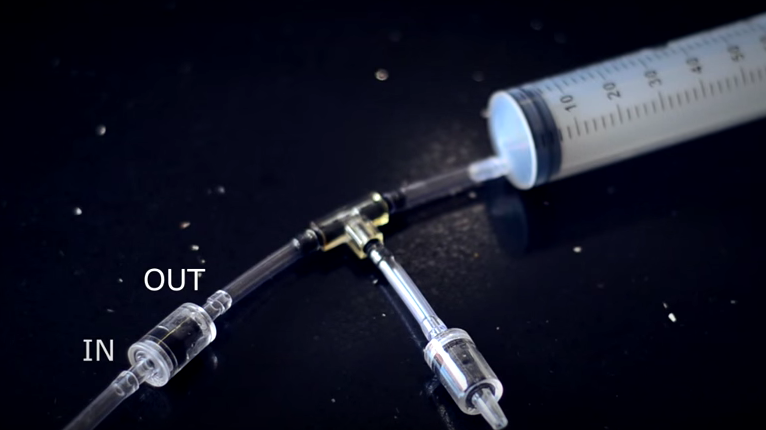
The first step is to take the tubing and cut out three sections that are 2-3 inches in length each. Attach one piece to each end of the T connector by twisting and placing firm, downward pressure over the tips. Next, attach the input side of one of the check valves on the line that makes the stem of the T connector. Attach the output side of the other check valve on one of the other two lines that make the top part of the T. Each valve will have some form of identifier that indicates which is which.
The next step is to attach the syringe to the remaining open line on the T connector. Make sure that you are using a syringe that has a fitting that will be big enough so squeeze into the line and create a secure fit. Keep in mind that the size of the syringe that you choose will also influence how much suction can be generated as you remove air from the bags. Larger syringes will remove more air than smaller ones in a single pull.
![]()
Preparing the Bag
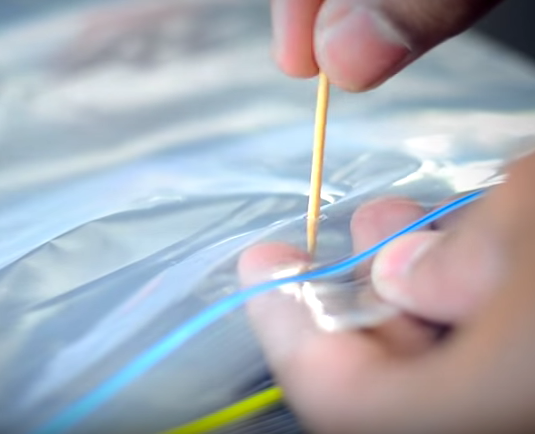
Take a toothpick or nail and poke a hole through the center of the bag, just below the zipper strip. Make sure that you only make one hole on one side of the bag. Place the food that you want to store into the bag. Take the long strip of air tubing and cut one of the ends at an angle so it is pointy. You will use this to make attaching the tubing to the bag easier. It will also minimize stretching which can cause air to escape and reduce the force of the suction as you pull the syringe later.

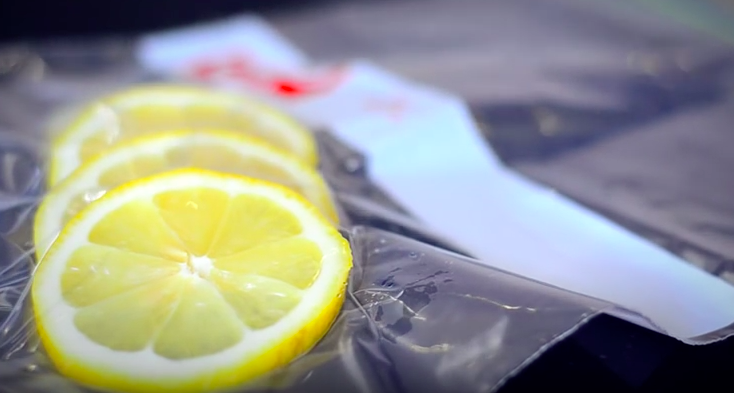
Feed the tube into the bag, placing it in almost all the way to the bottom. However, if you are sealing moist items, make sure that the tubing rests above the “water line” as air is drawn out. Otherwise, you can end up pulling out some of the liquid and creating a huge mess both inside the bag and through out the vacuum assembly. Seal the zipper lock on the bag after the tubing has been inserted.
All you need to do now is pump the syringe in and out until the air is sucked from the bag. The second valve that you’ve inserted eliminates the need to have to use a very large syringe or repeatedly detach, depress, reattach and pull the syringe over and over again in order to remove all of the air. However, you can also use a single line and syringe if you don’t have access to the parts that make this shortcut possible.
In any case, when all of the air is removed, you need to carefully remove the line from the bag while simultaneously plugging the hole with your finger. Carefully place the tape next to the hole. Gently remove your finger as you place the tape over the hole. This may take a couple of tries to get the feel for the process, but the end result should be that you allow minimal air to enter the bag as you seal up the hole.
Try this trick out and see how it can really improve the shelf life of many foods without the need for a vacuum sealing machine. It will also help to conserve space as it compresses the items inside the bag as well. Nothing could be easier, and you can enhance your food storage options by taking a couple of minutes to prepare this vacuum system that can be used over and over again.