How to Build A Rolling Compost Sifting Drum
This ingenious trick makes sifting compost fast and easy. You can follow the steps below and build your own in just an hour or two, and the finished product will take a lot of the strain out of an otherwise laborious process. Take a look at the basic idea, and feel free to improvise to tailor it to your particular needs.
![]()
Required Material
Chicken or wire mesh
2 Bicycle rims
4 casters and associated screws or nails
8 feet of 2×4 or 2×6 lumber
Wire cutters
Length of wire for latching
Piece of plywood
![]()
Getting Started
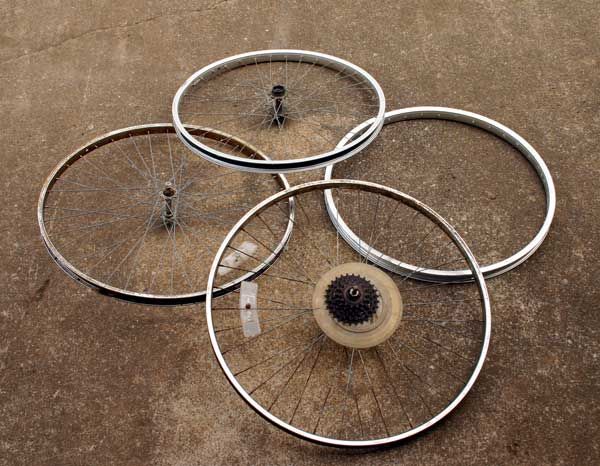
The first step is to determine the size of your sifter. This will depend on how big the bicycle rims are, so if you want a big unit, make sure to use big rims. Then, you will need to cut the wood and create a rectangular frame that will be about 2-3 inches longer and wider than the diameter of the rims. This will allow you some space for the casters and some “wiggle room” to ensure that the bin rotates smoothly later.
![]()
Building the Drum
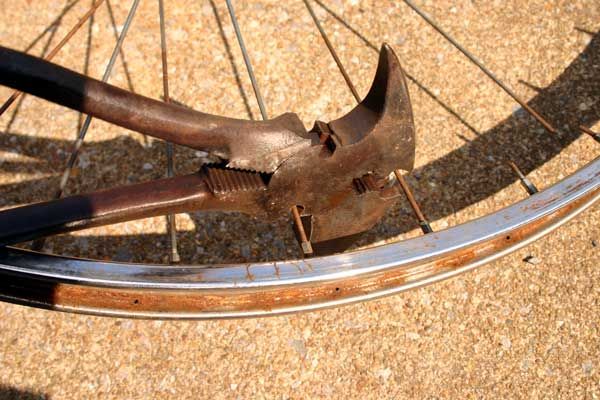
Remove the spokes by snipping them near to where they attach to the rims. The spoke assembly can be pulled out once they have all been cut. You can then pull out the remaining pieces through the holes along the outside of the rims. Discard the spokes or save them for future use.
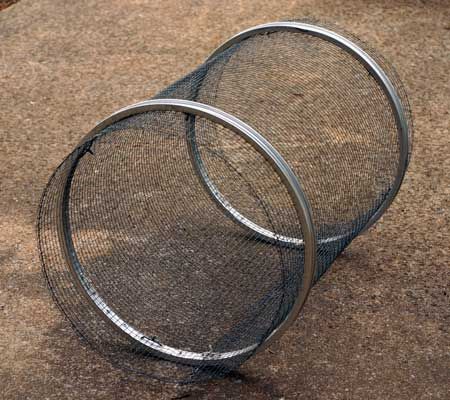
Next, unroll the chicken or wire mesh on the ground, and measure the length required to wrap around each rim. Make sure that you choose mesh that is wide enough to suit your purposes as well. Mark the spot and cut with the wire cutters. Trim as necessary. Roll the mesh around each rim, securing it in place with some small pieces of wire in the holes where the spokes used to fit through. Set aside once the bin has been formed.
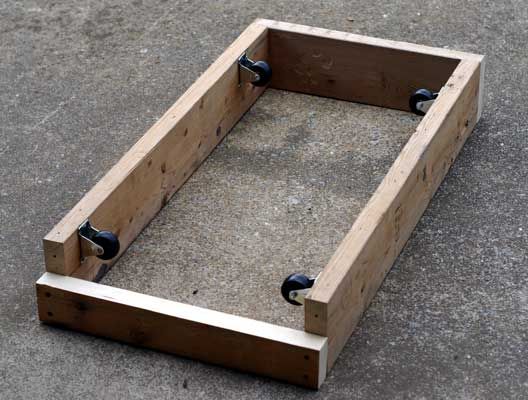
The next step is to build the frame. All you need to do is hammer or screw the four pieces of wood together. Sand down the edges to make them smooth to avoid getting slivers when working with the unit later. Place the drum inside the frame and center the unit. Mark off the spots on the frame where the rims are situated so you can attach the casters.
Attach two casters on each long side of the frame on the inside of each piece of wood. You may want to temporarily secure them with one screw or nail each so they can easily be removed and re-positioned if necessary. This is probably going to be the most tedious part of the project as the casters will most likely need to be fine-tuned to make sure that everything is aligned.
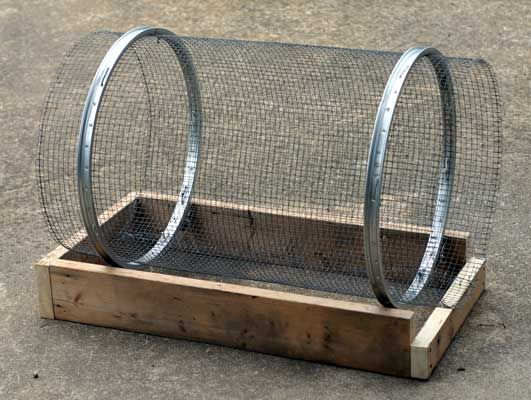
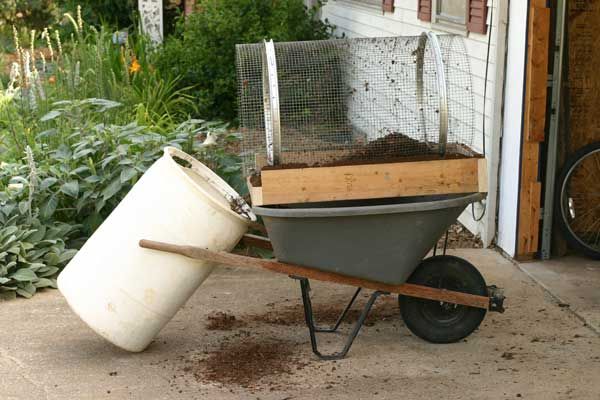
Finally, you want to take that piece of plywood and secure it to the inside of the frame on the BACK side of the drum. This is usually the end that is slightly angled while sifting, and a lot of material will rise up and fall out of the back. The plywood will help to keep everything in the drum. Consider cutting out a notch on either side of the plywood so it can rest atop the long-sides of the frame. This will provide you with a better fit and make this piece more effective.
That’s about it. Now, all you need to do is put your compost inside and start to roll the bin. The best thing to do is to place it atop a wheel barrel or big box that is angled slightly to make the process more efficient. The smaller material will fall through the holes in the mesh, or you may also be able to scoop it out at the front end if possible.
There’s a lot of room for improvisation with this project, and feel free to add a hatch in the drum to make putting in the compost easier. You can also add another rim in the center for some added stability, and this is particularly useful when working with a bigger unit. Feel free to play around until you get things just right, but at the end of the day, this simple project can save you from having to perform time-consuming and back-breaking labor to get your compost sorted.